
Quick start
Introduction
You have just received the Antigone module, and I thank you for that. Let's get straight to the point and ensure we play our first instrument.
This documentation refers to firmware version 1.1.4 (if you do not have the correct firmware, I encourage you to update your module) : How to update the firmware
The Init project
On first power-up, your module will start with the Init project.

The concept of a project is quite similar to the projects offered by Elektron machines (such as the Digitakt, etc.). A project can encompass one or more instruments and define the playing characteristics for each of them: the number of voices used, the playing mode (Monophonic, Legato, Stereo), the type of control (MIDI, CV/Gate), and more.
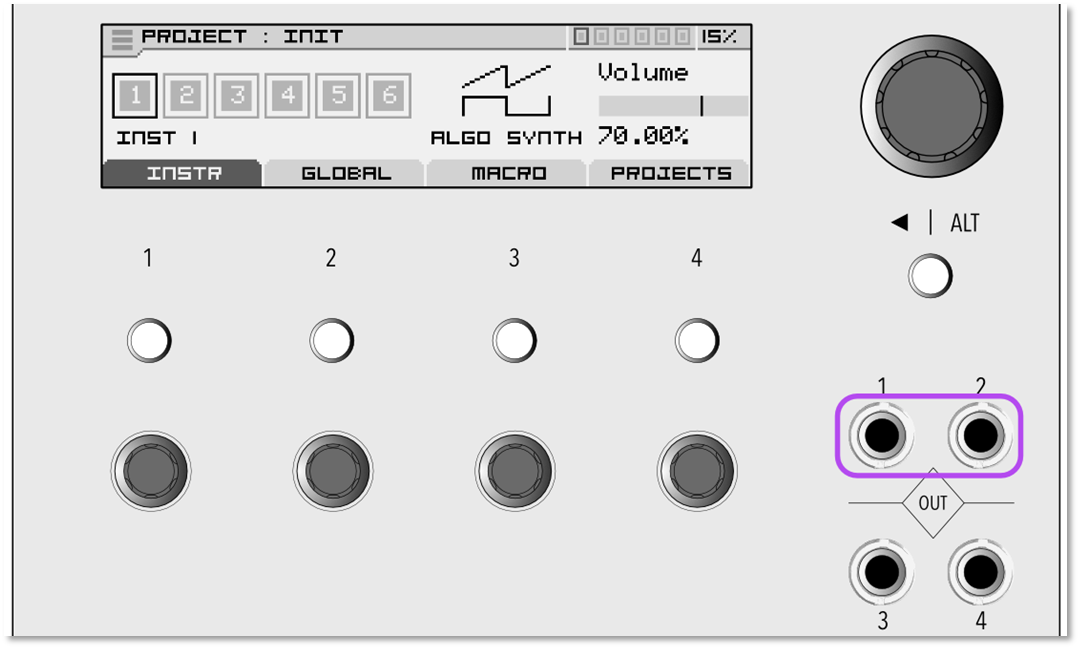
By default, the Init project only uses one instrument (INST 1), assigned to a single voice of the module (which has 6 voices in total). The sound produced by this voice is routed to outputs 1 and 2 of the module.
All of this can be modified later, but for now, let's stick with this simple configuration.
By default, the control type is set to "CV/Gate," but if you also have the "MIDI/CV Expander," the default control type will be configured as MIDI.
Connect an audio cable
Now connect a cable to the "Out 1" output of your module and connect the other end to your mixer, amplifier, or audio interface. Do the same with a second cable on the "Out 2" output.
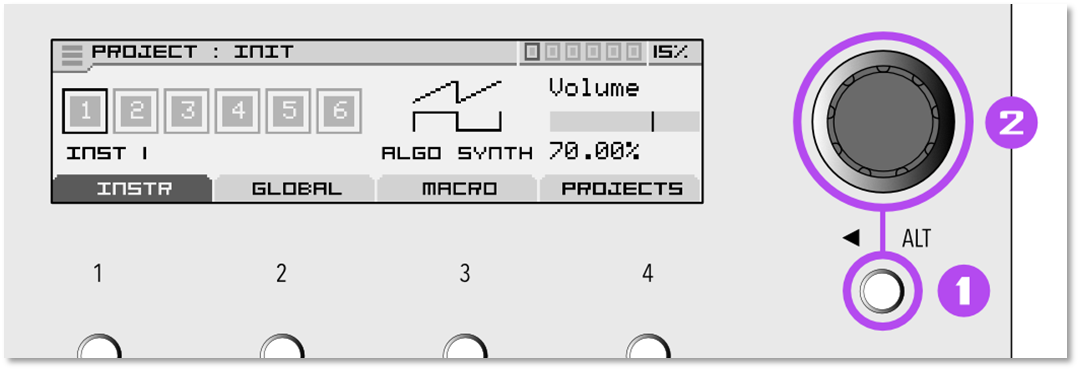
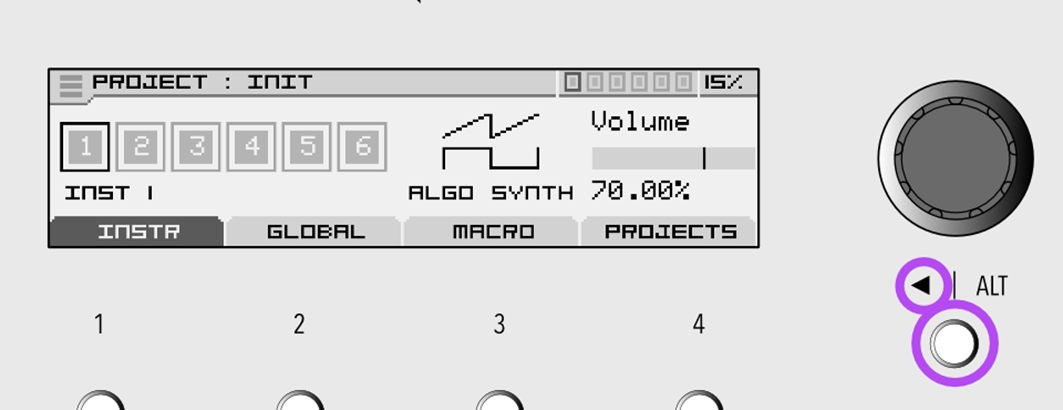
Tip: You can play a note right away by pressing and holding the ALT button, and while holding ALT, pressing the encoder will play the C2 note of your project.
Connect a keyboard
In the global settings of your project, you define the control type you want for this project: You can choose between CV/Gate or MIDI*.
*Note: MIDI will only be available if you have the expander.
Set the control type.
Important concept: For each project, you will be able to define the control type. It is crucial to understand that the control type is not set globally for your module, but rather within each individual project. Therefore, changing the control type of one project will not affect other projects on the SD card.
From the project's home screen, select instrument number 1, then click on the encoder.
Once you're in the instrument, turn the encoder all the way to the right to reach the last item, "CONTROL".
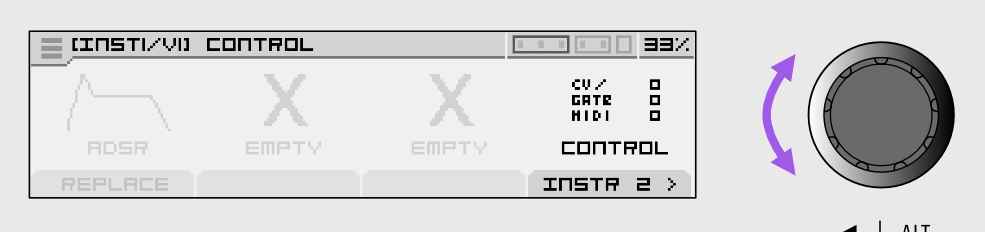
Once on "CONTROL", press the encoder. You'll arrive at the "Instrument Control" screen.
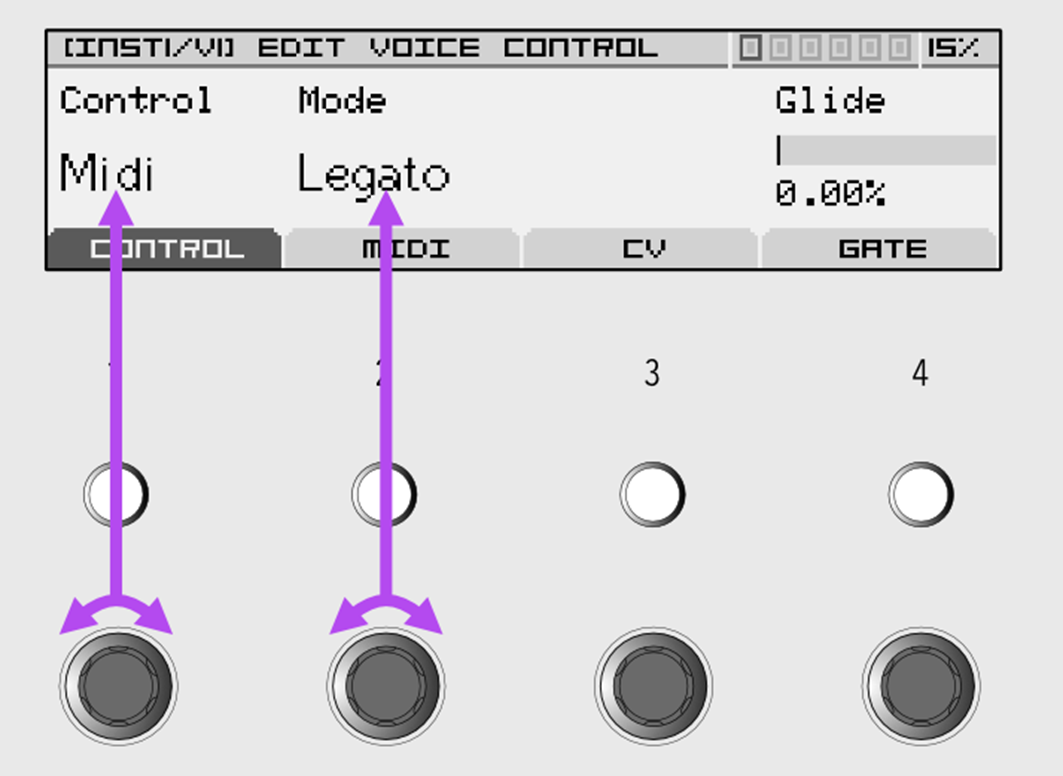
Select the type of control you want by turning the first potentiometer located directly below the "Control" parameter.
You can also change the mode by turning the second potentiometer.
CV/Gate
In CV/Gate control mode, you can use a compatible keyboard or controller.
Connect a cable to the "Gate 1" input of the module, and the other end to the "Gate" output of your keyboard.
Connect another cable to the "CV IN A" input of the module, and the other end to the "CV" (or Control Voltage, or Pitch, etc.) output of your keyboard.

You should now be able to play and hear the sound being sent to outputs 1 and 2.
Midi
If you choose the MIDI protocol, you will need to have the MIDICVExpander.
|
You can connect a TRS Type A or B cable to the designated input on the expander and connect the other end to the MIDI OUT of your MIDI-compatible keyboard.
|
MIDICV Expander |
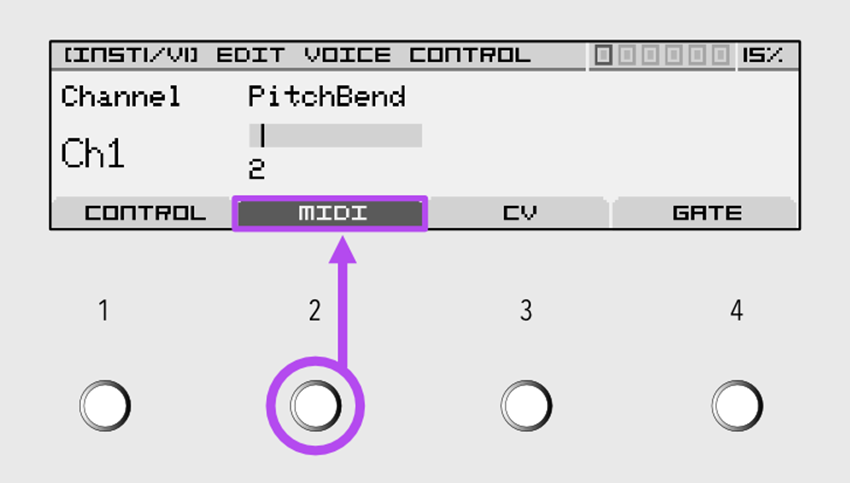 From the MIDI tab, accessible by pressing button 2 on this screen, you will have the option to set the MIDI channel and the Pitch Bend range.
The channel MIDI 1 is always used by default.
From the MIDI tab, accessible by pressing button 2 on this screen, you will have the option to change it.

Save your project
Save your project.
You can return to the original screen by pressing the ALT button multiple times, which activates the "back" function.
Once on this screen, access the "burger" menu in the top left corner of your screen by turning the encoder to the left.
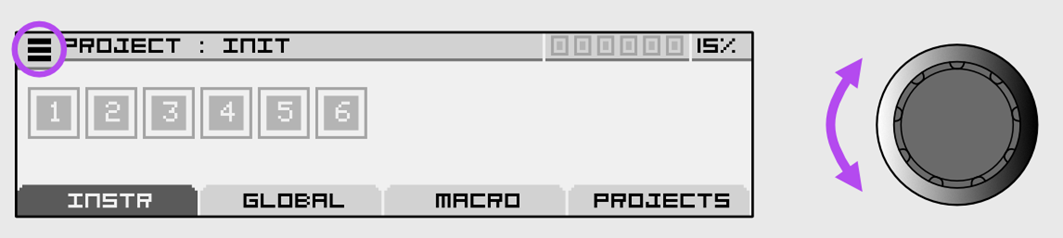
Then, click the encoder to open the selection menu.
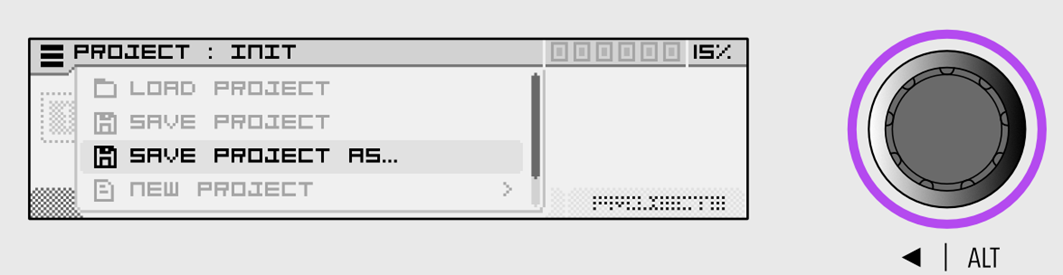
Turn the encoder to make your selection:
- Save project: Replaces the current project on the SD card.
- Save project as..: Saves the current project as a new project on the SD card.
Name your file
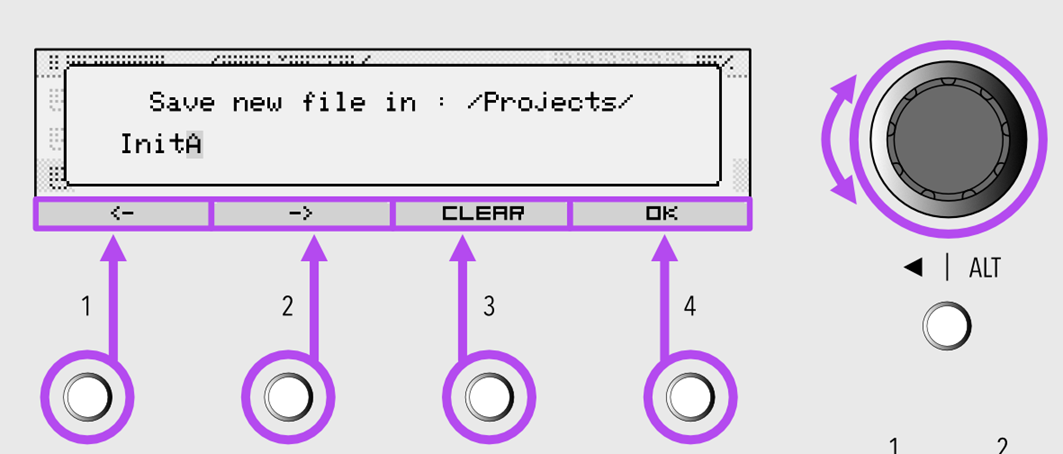
Select the character to modify using buttons 1 and 2.
Choose the symbol by turning the encoder.
Clicking the encoder confirms the character and moves the cursor to the right.
No Comments